
How to Take and Edit a Panorama
3:38 PM
Have you ever been in a breathtaking area like this but your camera just can't capture it all?
I was in a situation like that a few weeks ago, but then I remembered I learned how to take panoramic photos in a photography class once.
This was the first time I was able to put the process into practice, so I'm definitely no expert.
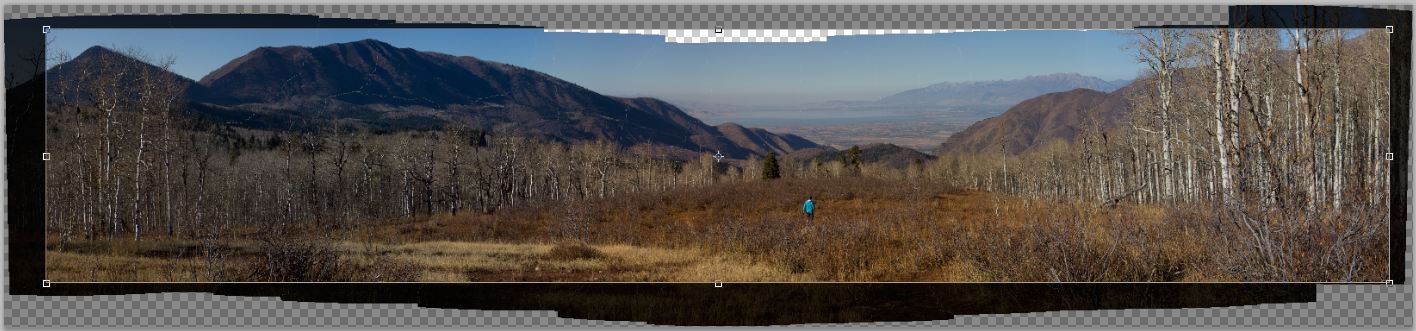
In this amateur tutorial we're going to put this panorama together:


This was made with a series of images taken while we drove the Nebo Loop in Payson, Utah.
This was the prettiest lookout spot because you could see all the way to Utah Lake.
That's my husband and my dog walking in the middle.
Step 1: Focus on a point far away, then switch your lens to manual focus. You don't want your camera to be focusing every time you take a picture, or the panorama won't work.
Then, before you start taking pictures, take a picture of your hand, like this.

That way, when you're going through your pictures at home, you will know without a doubt this is where your series of photos begins.
Step 2: Turn your camera so you are taking vertical (or portrait) images.

This will feel unnatural since you would normally take landscape images horizontally. But trust me on this one. You get your width from taking lots of pictures in a row, so you want to get as much height as possible in each picture.
Step 3: Start taking your photos starting at the left and moving right, (or vice versa, doesn't really matter what direction you go).

Try to keep your camera at the same height the entire time. (A tripod would help a lot, but I didn't have one with me.) Only move a little each time. You want to make sure there's lots of overlap in each picture.
Step 4: When you get back to your computer, open Adobe Bridge and select all your images (shift-click or ctrl-click to select more than one image). My pan was really long, so I have 20 images in my series.

Step 5: Click Tools -> Photoshop -> Photomerge

Step 6: The following dialogue box will open. Auto layout will work for most pans. Make sure "Blend Images Together" and "Vignette Removal" are checked. Click okay.

Step 7: Be patient while Photoshop opens and works its magic. Photoshop will create a new document with as many layers as there are images in your series.

The image will look something like this:

(I guess I wasn't as straight as I originally thought.)
Step 8: Crop the image.
Hit save and you're done! My picture required a bit more Photoshopping because of my unsteady hand, but you get the idea.

After I saved my image I decided it was too long, so I went back and cropped it again.
Here's the final image again. I think I can see my house from here!


0 comments